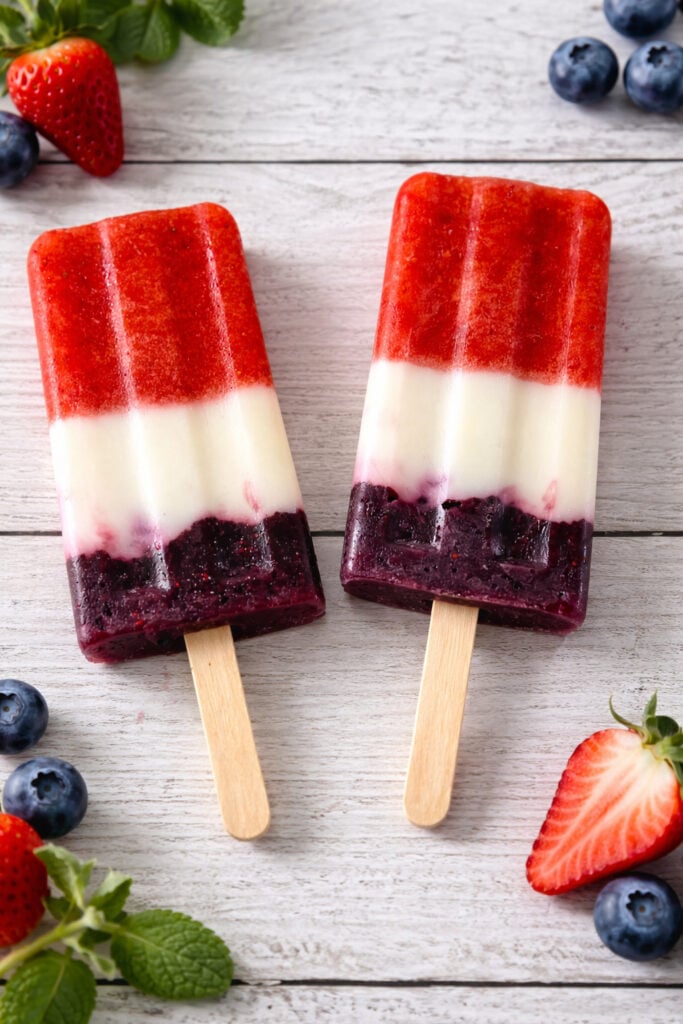
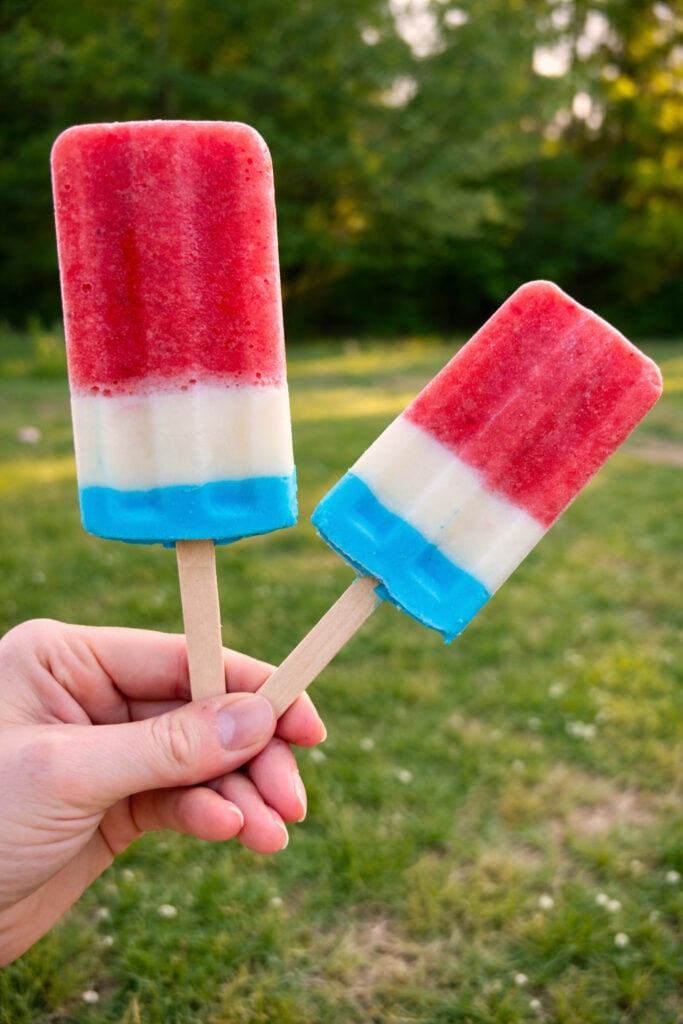
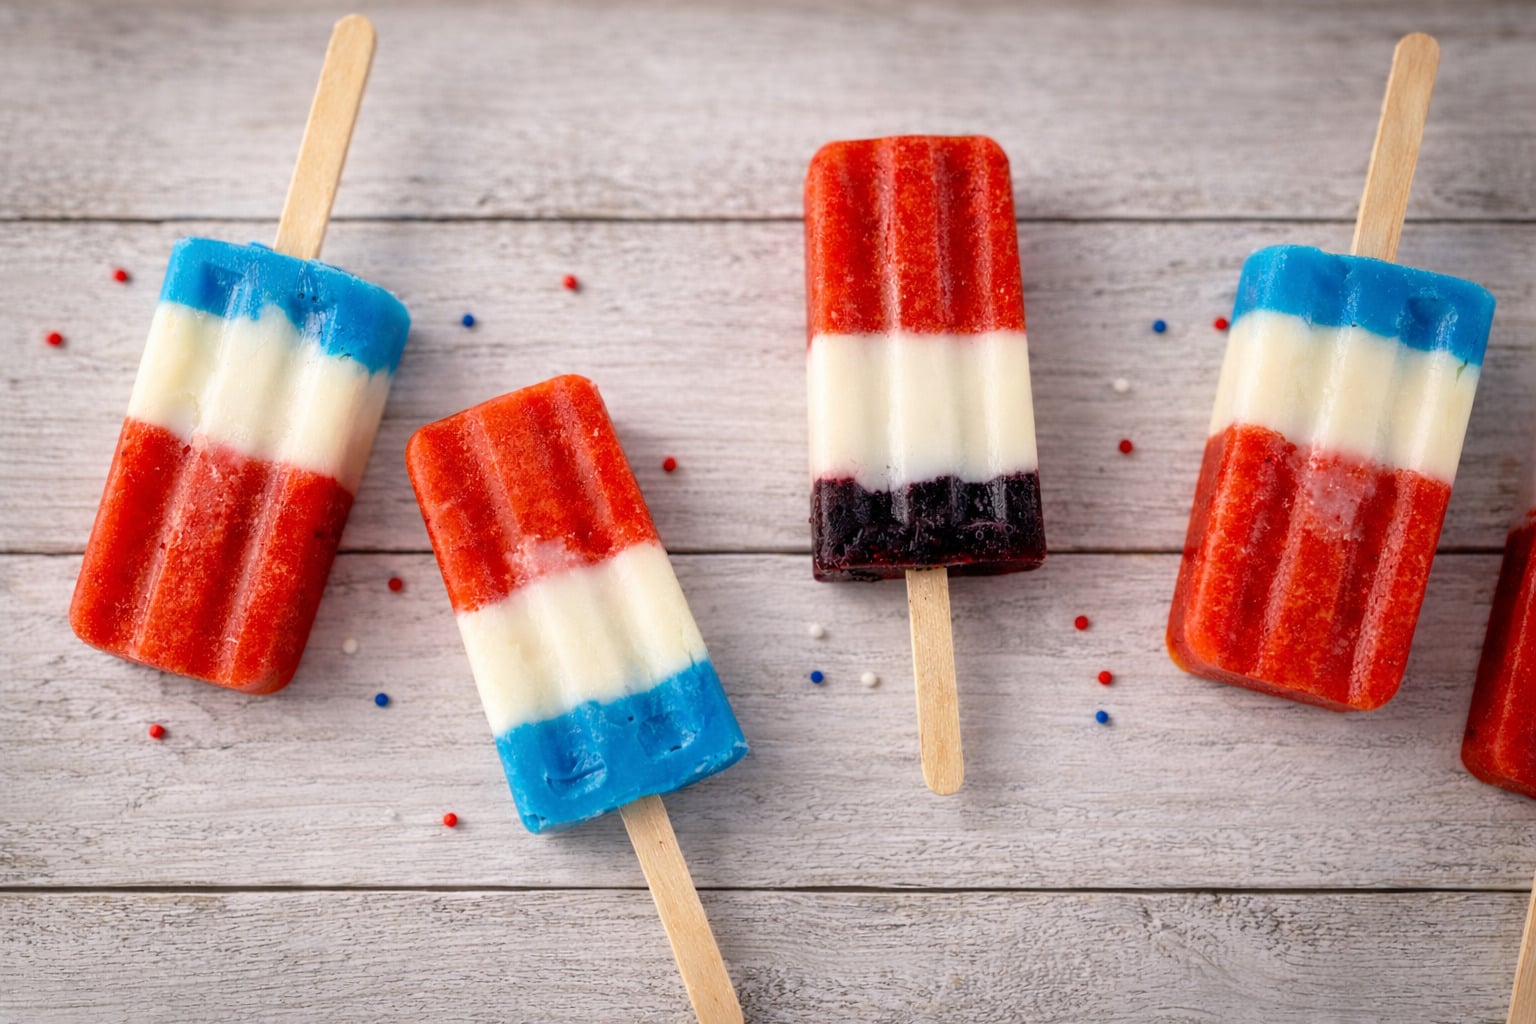
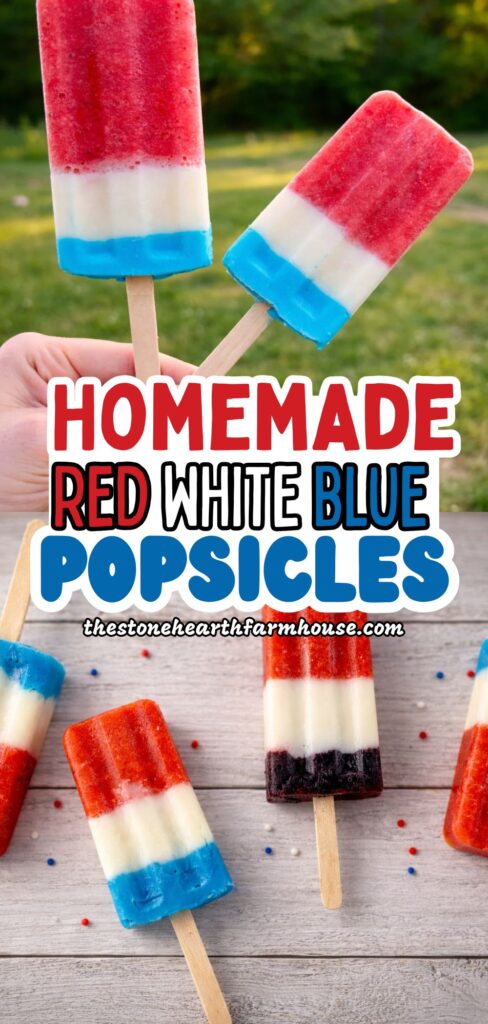
Red White & Blue Popsicles
When summer hits and the temperatures rise, there’s nothing better than a refreshing, homemade frozen treat. These red white and blue popsicles are the perfect patriotic popsicles for celebrating the Fourth of July, Memorial Day, or any summer holiday. Made with real food ingredients like fresh strawberries, creamy Greek yogurt, and juicy blueberries, this recipe keeps things simple, wholesome, and delicious.

If you grew up chasing the ice cream truck for those classic bomb pops, this homemade version is a healthier twist you can feel good about serving your family. With layers of fresh berries and naturally sweetened yogurt, these fruit popsicles are just as fun, without all the added sugar.
This post may contain affiliate links. As an Amazon Associate I earn from qualifying purchases.
Why You’ll Love These Red White and Blue Popsicles
These homemade popsicles are:
- Made with natural ingredients
- Perfect for a hot summer day
- Easy to customize with different flavors and colors
- A fun activity for kids (they’ll love building each layer!)
- A beautiful addition to any patriotic party or birthday party
The layered look may seem fancy, but it’s surprisingly simple, just freeze each layer before adding the next!
Tips for Perfect Layered Popsicles
- Use a silicone mold or sturdy popsicle molds for easy removal
- Freeze each layer until slightly firm before adding the next to prevent mixing
- Pour slowly and carefully to keep clean layers
- If you don’t have popsicle sticks, cover molds with aluminum foil and insert sticks through the center
- Run molds under warm water for easy release
Healthy Ingredients Breakdown
Each layer uses simple, wholesome ingredients you can find at most grocery stores:
- Red Layer – fresh strawberries blended with lemon juice and maple syrup
- White Layer – creamy Greek yogurt with vanilla extract
- Blue Layer – blueberries blended and strained for a smooth texture
You can also swap honey or maple syrup depending on your preference.
Optional Variations
- Use full fat coconut milk instead of yogurt for dairy-free popsicles
- Add a light blue layer for a softer pastel look
- Try a star-shaped ice cube tray to create fun white stars to mix into layers
- Mix different colors slightly for a tie-dye effect
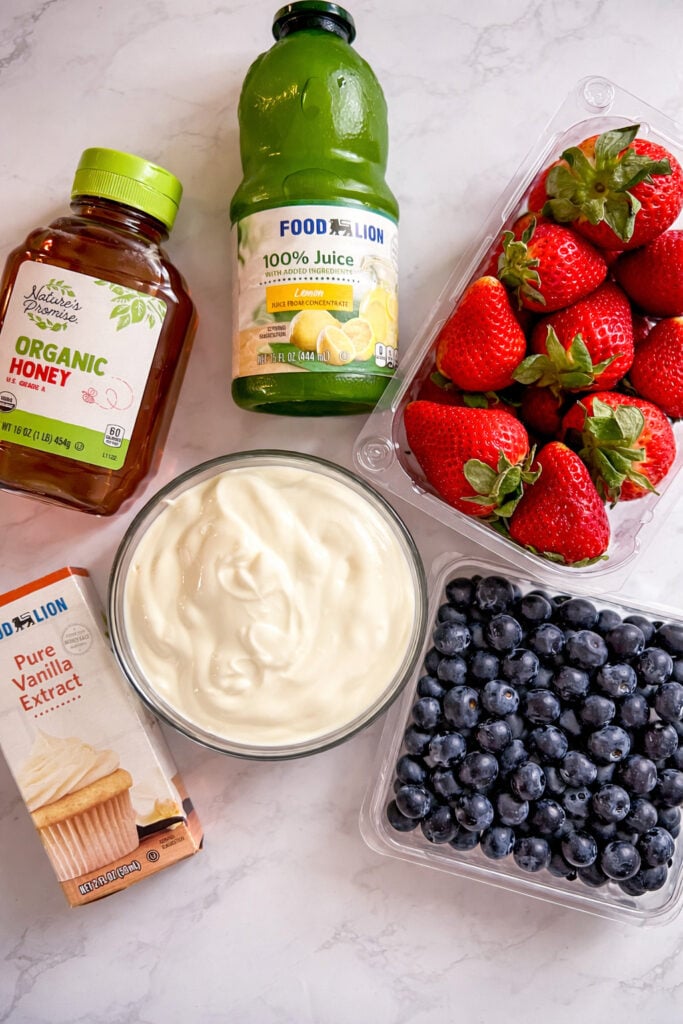
Ingredients
Red Layer (Strawberry)
- 1 cup strawberries (fresh or frozen)
- 2–3 tablespoons honey or maple syrup
- 1 tablespoon lemon juice
White Layer (Vanilla Yogurt)
- 1 cup Greek yogurt or whole milk vanilla yogurt (Stonyfield is my favorite)
- 2 tablespoons honey or maple syrup
- 1/2 teaspoon vanilla extract
Blue Layer (Blueberry)
- 1 cup blueberries (fresh or frozen)
- 2–3 tablespoons honey or maple syrup
- 1 tablespoon lemon juice
Optional Light Blue Layer
- 1/2 cup yogurt
- 1–2 drops blue gel food coloring
Instructions
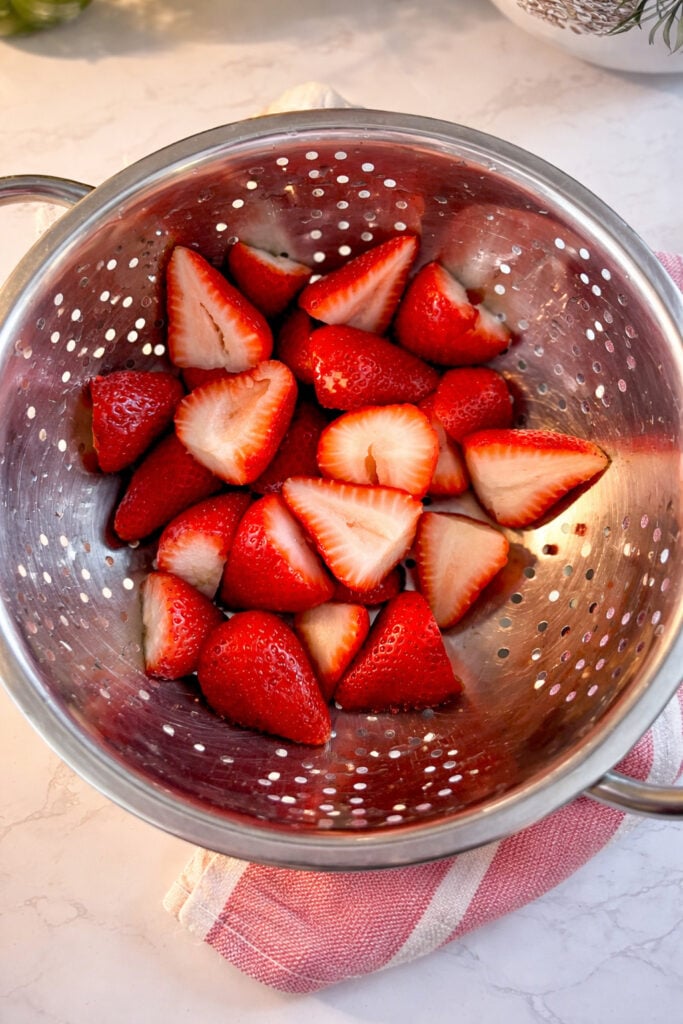
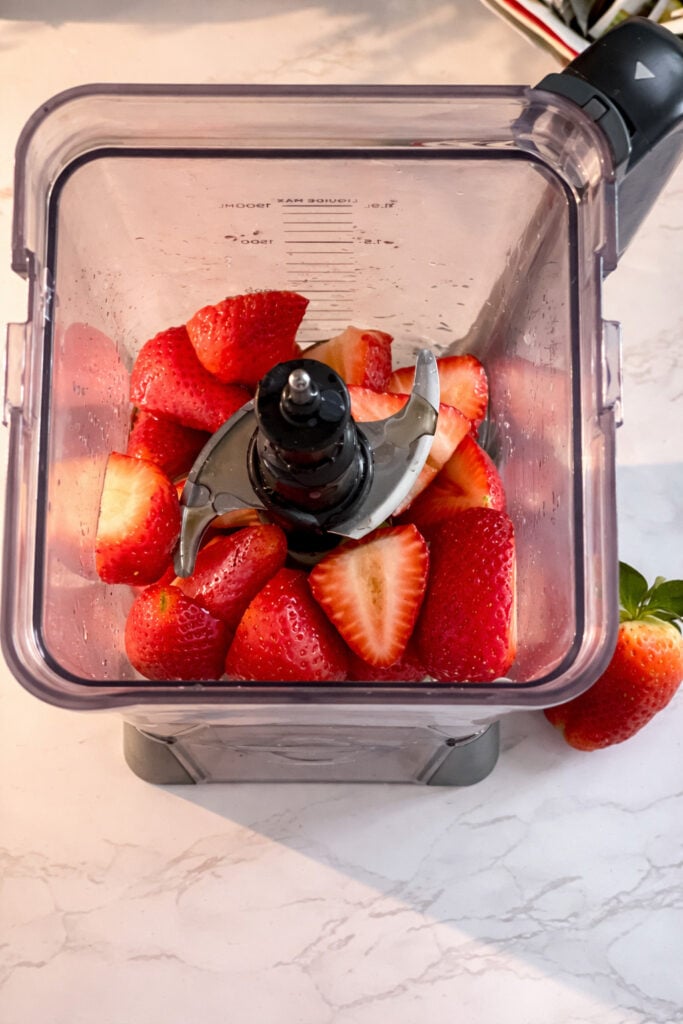
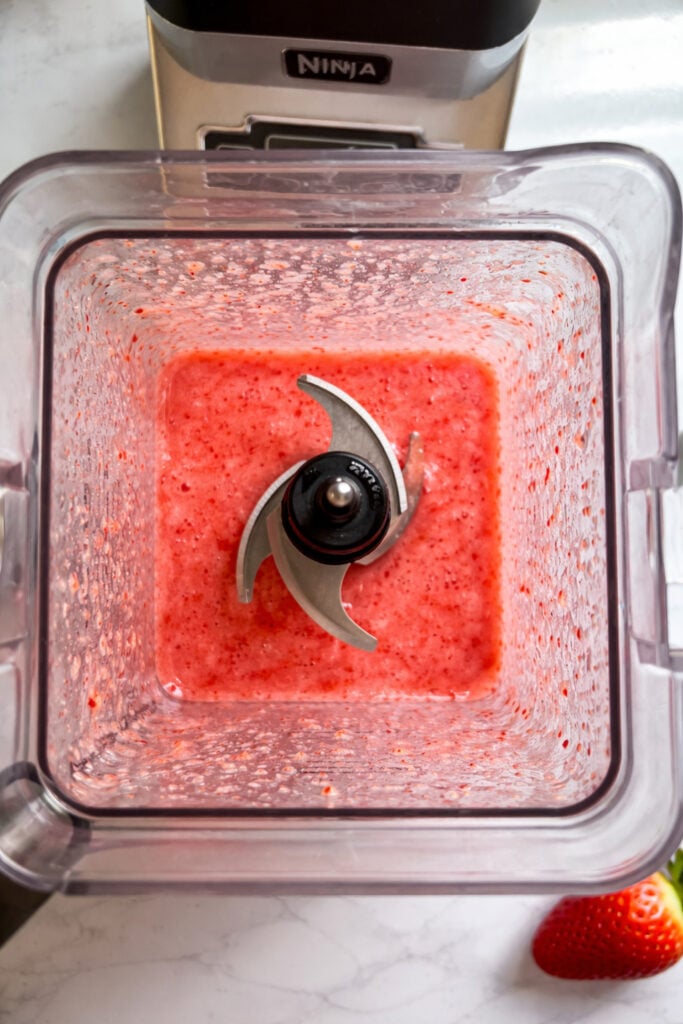
Make the red layer:
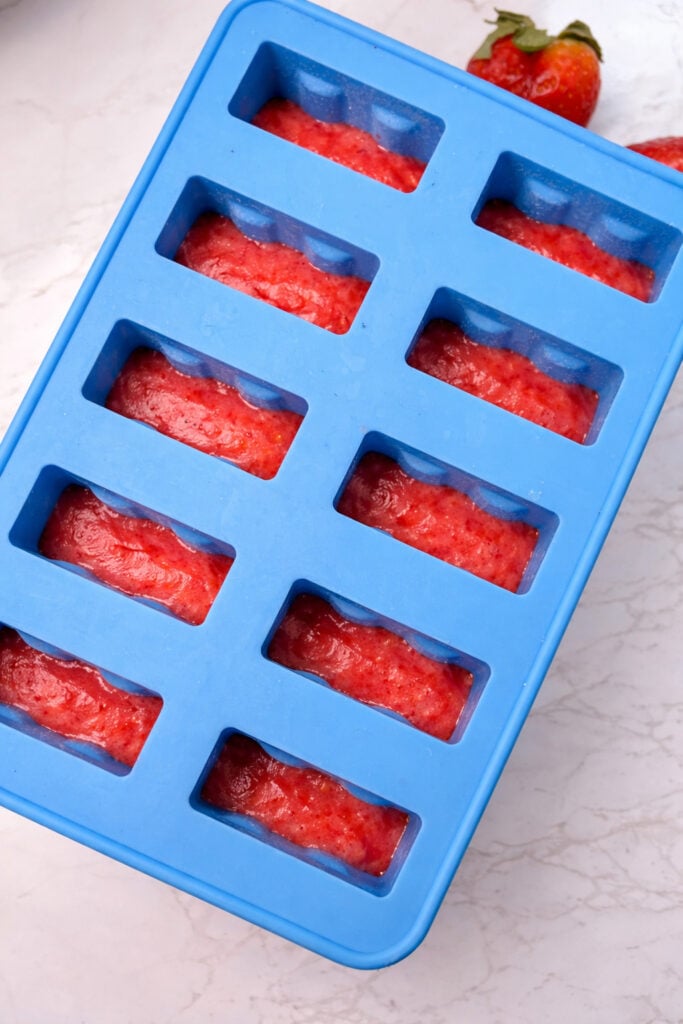
- Blend strawberries, honey, and lemon juice until smooth in a food processor.
- Pour about 2–3 tablespoons into each popsicle mold (filling about one-third of the way).
- Freeze for 30–45 minutes, until slightly firm.
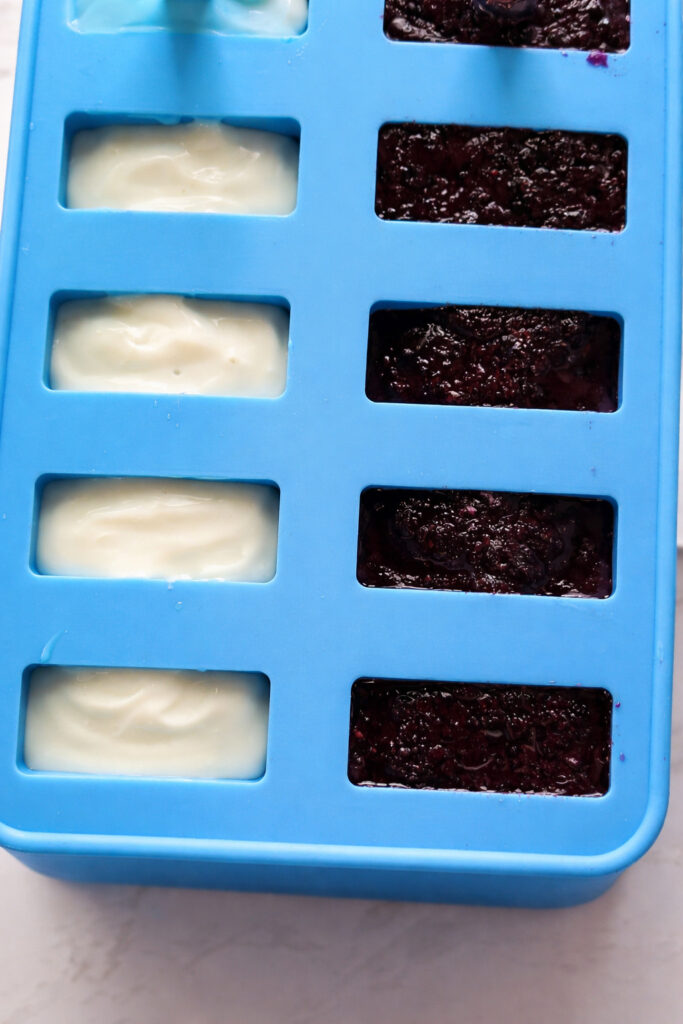
Prepare the white layer:
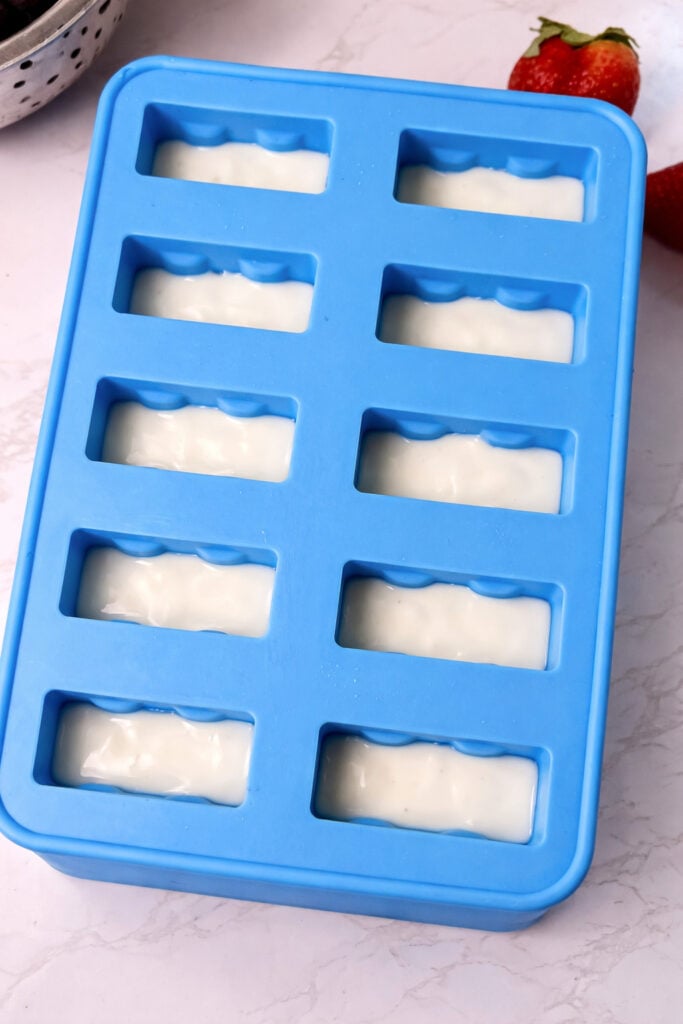
- In a bowl, stir together yogurt, honey, and vanilla extract until smooth.
- Carefully spoon 2–3 tablespoons over the red layer.
- Freeze again for 30–45 minutes.

Make the blue layer:
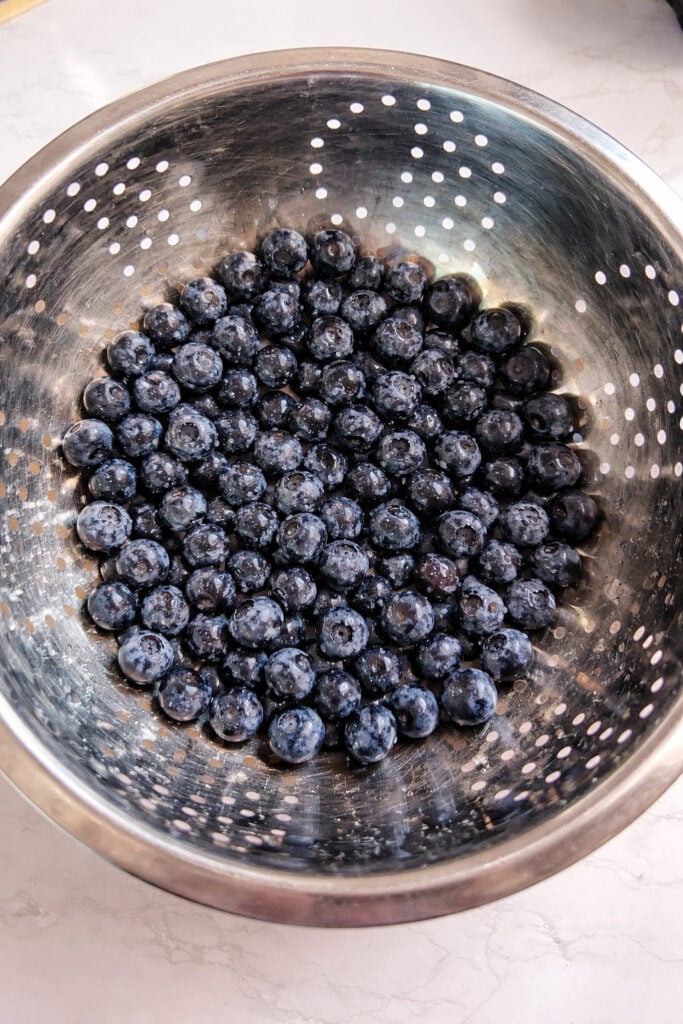
- Blend blueberries, honey, and lemon juice until smooth.
- Strain the mixture through a fine mesh strainer to remove the blueberry skins for a smoother texture.
- Pour 2–3 tablespoons over the white layer.
Optional light blue layer:
- Mix yogurt with 1–2 drops of blue gel food coloring until a soft light blue color forms.
- Use this in place of the blueberry layer for a pastel version.
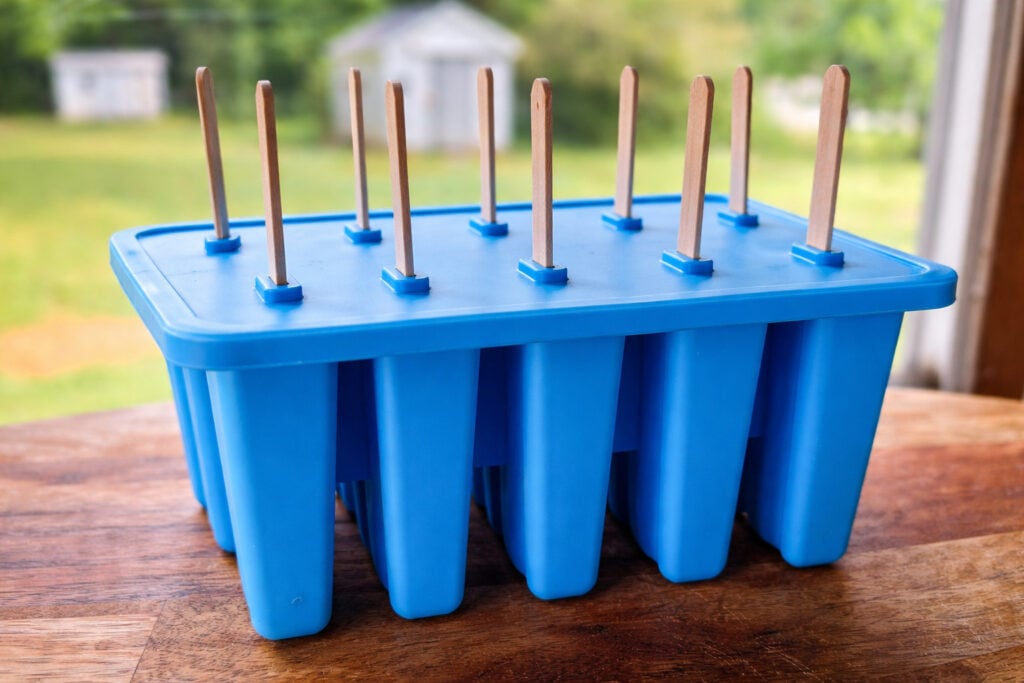
Insert sticks and freeze:
- Add popsicle sticks.
- Freeze for 4–6 hours, or until completely solid.
Remove and serve:
- Run molds under warm water for 10–15 seconds.
- Gently pull out popsicles and serve immediately.
Tips for the Best 4th of July Popsicles
- Adjust sweetness based on your fruit and preference
- For cleaner layers, make sure each layer is partially frozen before adding the next
- Store popsicles in an airtight container or freezer bag for up to 2 weeks
- Wrap individually with plastic wrap if storing long-term
Frequently Asked Questions
Yes! Frozen fruit works just as well as fresh berries and is often more affordable.
Using yogurt in the white layer helps create a creamy texture. You can also add a little coconut cream to fruit layers for extra smoothness.
These are a great option compared to store-bought versions. They’re made with real food ingredients, natural flavor, and excess added sugar.
These red white and blue popsicles are a fun, festive tradition your family will look forward to every summer. Whether you’re celebrating Independence Day or just cooling off on a hot afternoon, these homemade popsicles are a simple, beautiful way to enjoy the season.
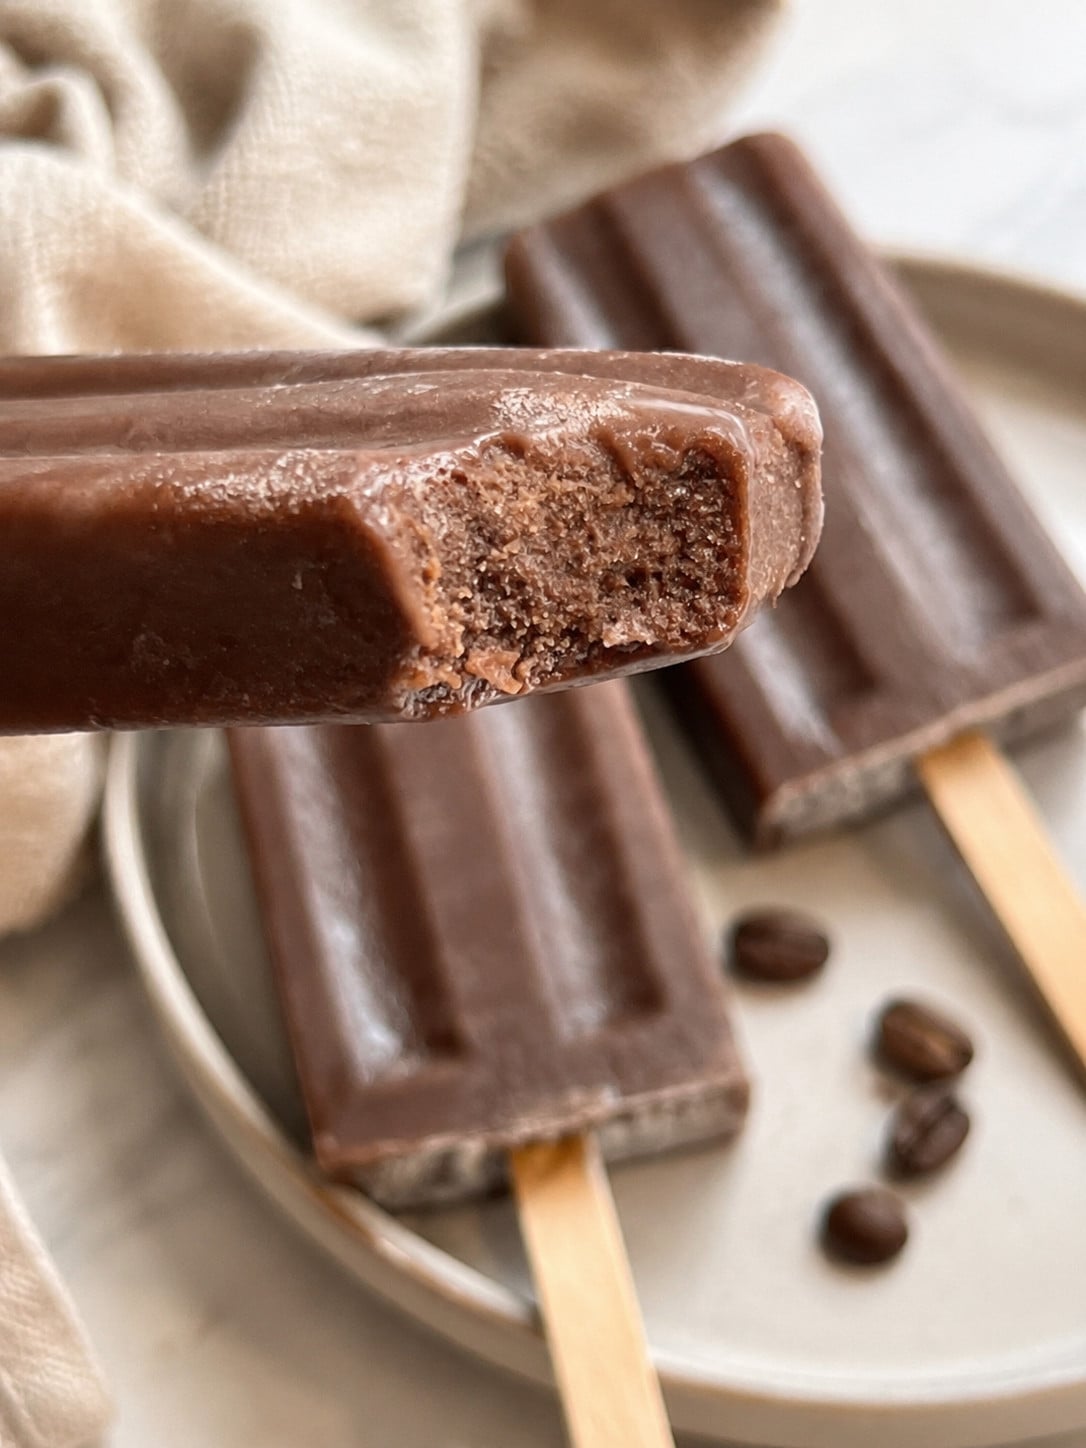
♡ More Freshly Made Dessert Recipes ♡

Red White and Blue Popsicles Recipe
Red White & Blue Popsicles
Ingredients
Red Layer (Strawberry)
- 1 cup strawberries fresh or frozen
- 2 –3 tablespoons honey or maple syrup
- 1 tablespoon lemon juice
White Layer (Vanilla Yogurt)
- 1 cup Greek yogurt or whole milk vanilla yogurt I love Stonyfield
- 2 tablespoons honey or maple syrup
- 1/2 teaspoon vanilla extract
Blue Layer (Blueberry)
- 1 cup blueberries fresh or frozen
- 2 –3 tablespoons honey or maple syrup
- 1 tablespoon lemon juice
Optional Light Blue Layer
- 1/2 cup yogurt
- 1 –2 drops blue gel food coloring
Instructions
Make the red layer:
- Blend strawberries, honey, and lemon juice until smooth.
- Pour about 2–3 tablespoons into each popsicle mold (filling about 1/3 full).
- Freeze for 30–45 minutes, until slightly firm.
Prepare the white layer:
- In a bowl, stir together yogurt, honey, and vanilla extract until smooth.
- Carefully spoon 2–3 tablespoons over the red layer.
- Freeze again for 30–45 minutes.
Make the blue layer:
- Blend blueberries, honey, and lemon juice until smooth.
- Strain the mixture through a fine mesh strainer to remove the blueberry skins for a smoother texture.
- Pour 2–3 tablespoons over the white layer.
Optional light blue layer (instead of dark blue):
- Mix yogurt with 1–2 drops of blue food coloring until a soft light blue color forms.
- Use this in place of the blueberry layer for a softer, pastel look.
Insert sticks and freeze:
- Add popsicle sticks and freeze for 4–6 hours, or until completely solid.
Remove and serve:
- Run molds under warm water for 10–15 seconds to release popsicles. Serve immediately.
Notes
- Let each layer firm up before adding the next to keep clean, defined layers
- Straining the blueberry mixture creates a smoother popsicle without skins
- Do not remove the popsicles from the molds too soon, as the white layer will get stained by the blue layer.
I was looking for a 4th of July popsicle recipe and this one looks amazing! Thank you!
so fun! we make tons of popscicles and our kids would love these!
These look great! I’m going to make them for Memorial Day and the 4th of July. 🙂